 Help Center
Set Up Your Account
Set Up Your Account
Email Custom Sending Domain
| Where to find it | Settings → Basic settings → Shared email account → LC email marketing → Sending domain Open Shared email account |
|---|---|
| Who can do this | By default, Owners, Admins, and Editors, plus someone who can edit your domain’s DNS settings. |
| Before you start | An active Email Marketing subscription with LC email marketing selected, and access to your DNS provider. If your web developer manages DNS, involve them now. |
| Time needed | About 10 minutes, then up to 48 hours for DNS changes to take effect. |
A custom sending domain authenticates your email using your own domain. Your messages stop showing “via LeadCenter.AI” in the byline, mailbox providers can see the email is genuinely authorized by you, and your sending reputation becomes yours to build.
Why Set One Up
- Better inbox placement. If your email is landing in spam, this is the first thing to fix.
- A reputation you own. You can measure and improve your own deliverability rather than sharing a generic one.
- Corporate recipients. Many businesses and internet providers reject unauthenticated email outright.
- DMARC compatibility. If your domain has a DMARC policy, unauthenticated email will fail it. See DMARC Security.
What LeadCenter can and cannot do with your domain. Adding these records gives LeadCenter permission to send email on your behalf. It does not give us access to your domain, your website, or your mailboxes. The records rarely need changing once added, and you can delete them at any time.
Step 1: Open the Sending Domain Section
- Click your name or profile picture in the top-right corner and select Settings.
- Open the Basic settings tab.
- Click Shared email account.
- Select LC email marketing. The Sending domain and Sending email cards appear below it.
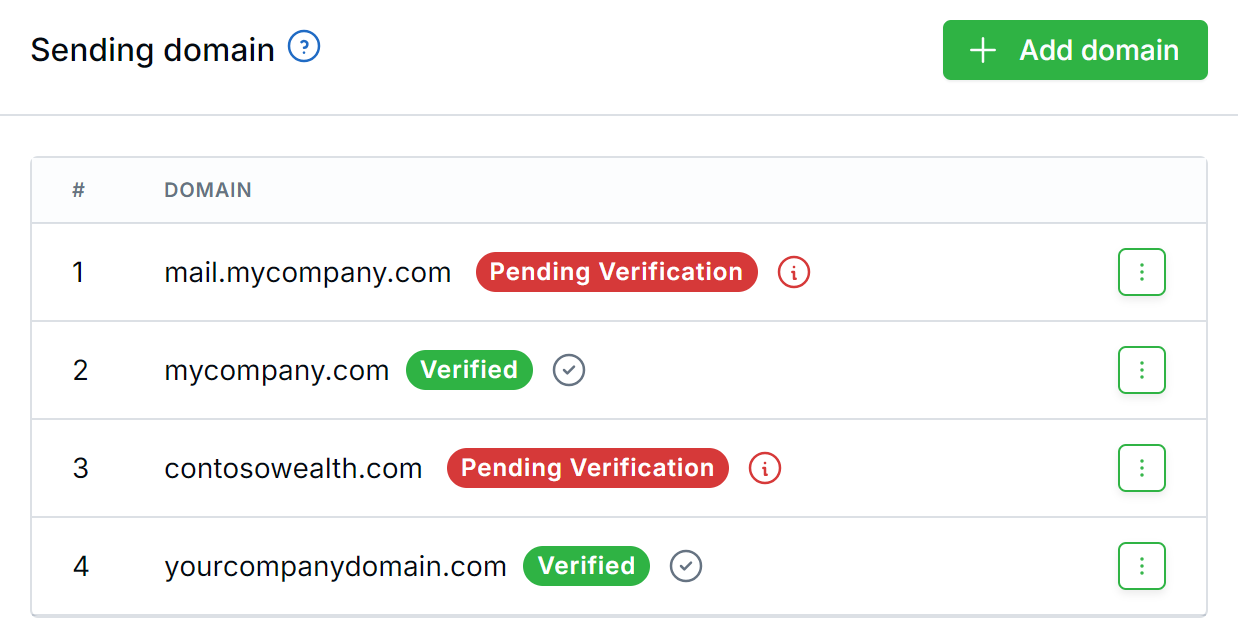
The Sending domain card.
Step 2: Add Your Domain
- In the Sending domain card, click Add domain.
- In the Add sending domain window, type your domain, for example
yourcompanydomain.com. Enter the domain only, with nowwwand nohttps://. - Click Save.
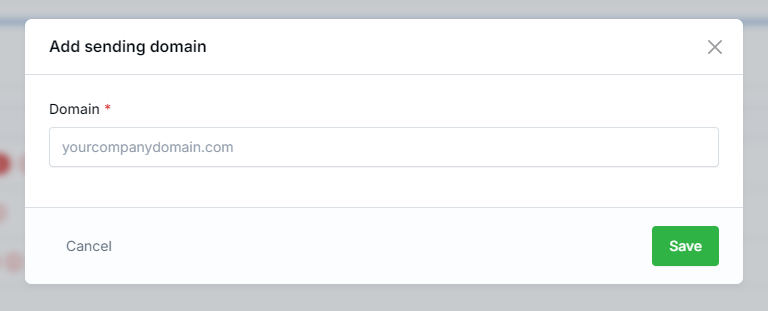
Enter your domain only, with no www or https://.
The domain appears in the list with a red Pending Verification badge. That is expected because you have not added the DNS records yet.
Step 3: Get Your DNS Records
- Click the three-dot menu at the end of your domain’s row.
- Choose DNS records.
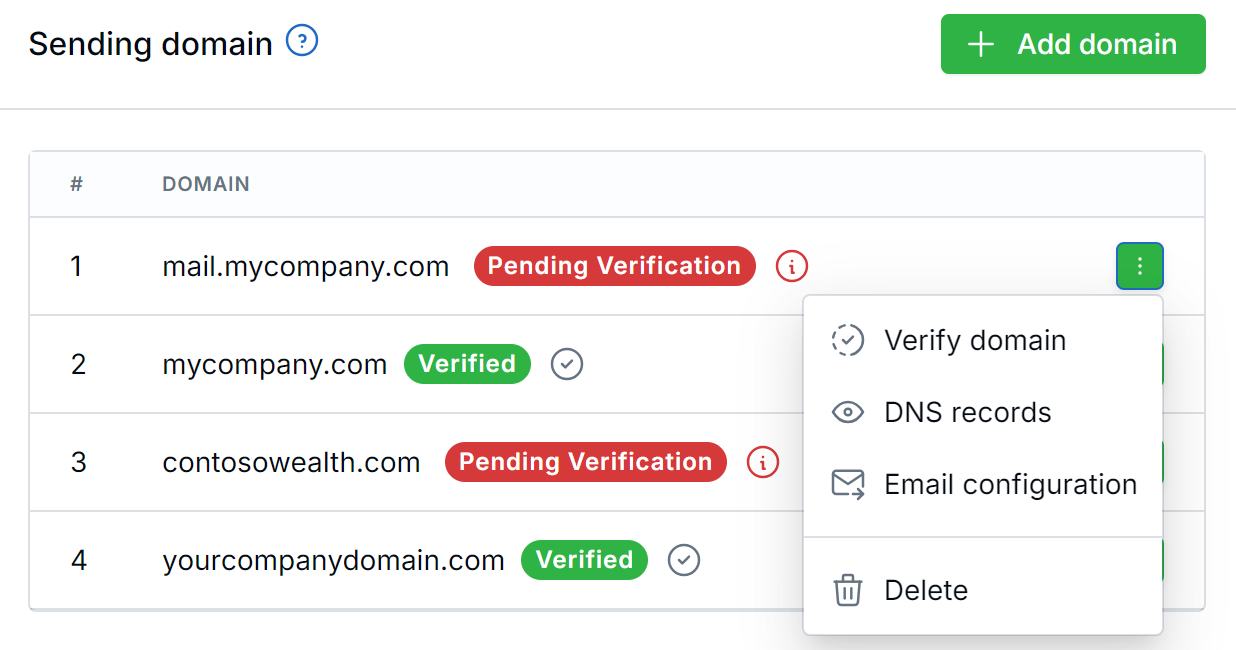
Choose DNS records from the menu.
You will see a table with three columns (Type, Host, and Value), and a copy button next to each entry. Use the copy buttons rather than retyping; a single stray character will stop verification.
Above the table, LeadCenter reminds you that some DNS providers need your domain added to the end of each host name. Step 4 explains how to tell which kind of provider you have.
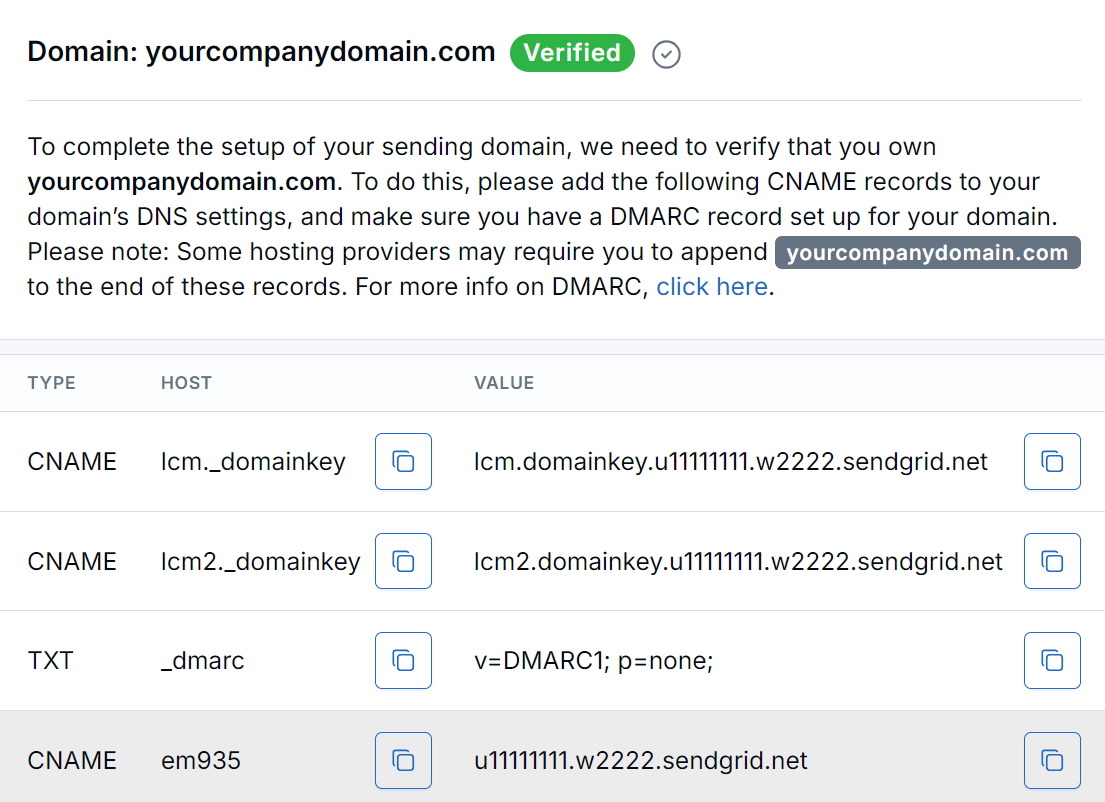
Use the copy buttons to copy each host and value.
Prefer to hand this to someone else? From the same three-dot menu, choose Email configuration to email the DNS records to your web developer or IT provider.
Step 4: Add the Records at Your DNS Provider
Add each row from the table to your domain’s DNS settings, matching type, host, and value exactly.
For provider-specific, click-by-click instructions (GoDaddy, Namecheap, Cloudflare, Squarespace, AWS Route 53, cPanel hosts, and others), see Adding DNS Records Made Easy: Email, Landing Pages, FQ & SSL. That guide also covers the one mistake that causes most verification failures.
The doubled-domain trap. Some DNS providers add your domain to the host name
automatically, and others do not. If yours adds it automatically, entering
lcm._domainkey.yourcompanydomain.com produces
lcm._domainkey.yourcompanydomain.com.yourcompanydomain.com, which will never verify.
After saving, re-open each record and read the final host name. It should end in your domain
exactly once.
Step 5: Verify
- Come back to LeadCenter.
- Either click Verify Domain at the bottom of the DNS records page, or use the three-dot menu on the domain row and choose Verify domain.
When it succeeds, the badge turns green and reads Verified. If it fails, LeadCenter lists which records did not check out so you know exactly what to fix.
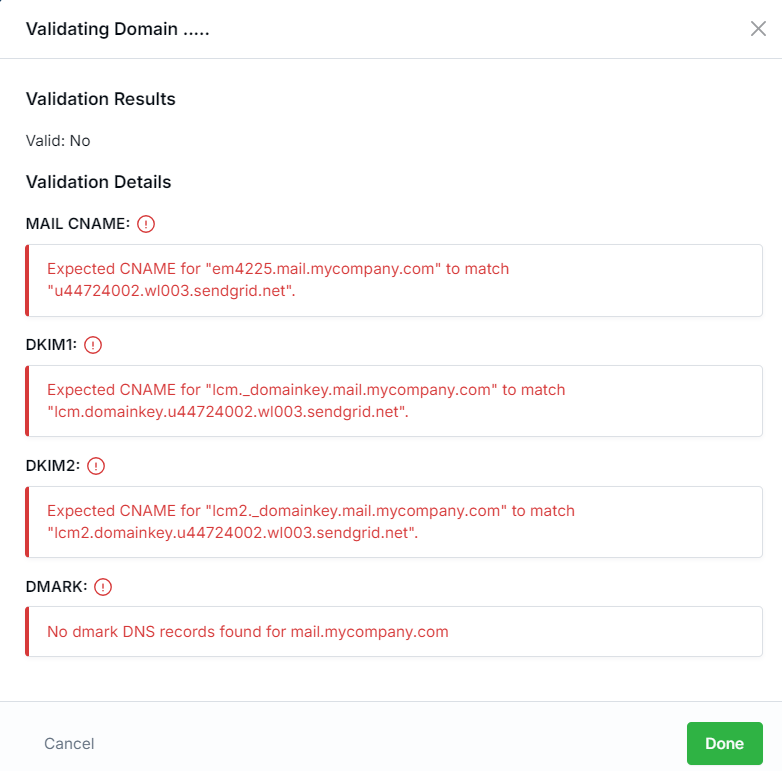
If verification fails, LeadCenter shows which records to fix.
Give DNS time. Changes usually appear within minutes but can take up to 24–48 hours to propagate. If verification fails immediately after you save the records, wait and try again before troubleshooting.
Step 6: Add a Sending Email Address
A verified domain lets LeadCenter send as your domain, but you still need at least one specific address. Continue with Sending Email Address for LC Email Marketing.
Best Practices
- Always use the copy buttons. One wrong character and a record will not verify.
- Re-read every record after you save it. Check that the host ends in your domain exactly once and that leading underscores are still there.
- Do this before your first campaign. DNS can take up to 48 hours.
- Tell whoever manages your DNS not to remove these records. A website rebuild that resets DNS will silently break your email authentication.
Troubleshooting
Verification keeps failing
Work through these in order:
- Re-read each record at your provider. Is the host doubled, or missing your domain entirely?
- Did the leading underscore survive?
_dmarcand_domainkeymust keep it. - Are there extra spaces before or after a pasted value? Remove them.
- Does another record already use the same host name? Two records sharing a name conflict. Remove or update the old one.
- On Cloudflare, are the records set to DNS only, with a grey cloud rather than orange?
- Has it been less than an hour? Wait and try again.
- Some providers require a trailing period on the host name. If nothing else works, try adding one.
My provider will not accept underscores in a record name
Some registrars restrict this. Contact support@leadcenter.ai and we can issue alternative records for your account.
I already have records with the same names from another email service
They will conflict. Contact support@leadcenter.ai and we can generate custom record names for your account.
My domain was verified but has stopped working
Someone has most likely changed or removed the DNS records, often during a website rebuild. Re-open the DNS records page, compare against your provider, and re-add anything missing.
Frequently Asked Questions
Do I have to maintain these records?
No. They stay valid as long as nobody changes or deletes them. If someone rebuilds your DNS, you will need to add them again.
Can two LeadCenter accounts use the same domain?
Not normally, because the same records cannot be added to one domain twice. If you genuinely need it (for example, the same brand in several countries), email support@leadcenter.ai with the accounts you want linked and we can configure it.
Can I remove a sending domain later?
Yes, from the three-dot menu on the domain row. Talk to us first, because removing it will affect the deliverability of everything sending from that domain.
Will this give LeadCenter access to my website or email?
No. The records only let mailbox providers confirm we are authorized to send on your behalf.
What’s Next
Add the address your email will come from: Sending Email Address for LC Email Marketing.
Need help? Email support@leadcenter.ai.

Need more help?
If you can't find the answers you're looking for, our support specialists are available to answer your questions and troubleshoot if necessary.
-
Phone Call (888) 291-7116. Our main hours are Monday to Friday 7 am-5 pm Central Time.
-
Support Send your questions and inquiries via email to support@leadcenter.ai. A support ticket will be created and one of our team members will get back to you as quickly as possible.