 Help Center
Set Up Your Account
Set Up Your Account
Sending Email Address for LC Email Marketing
| Where to find it | Settings → Basic settings → Shared email account → LC email marketing → Sending email Open Shared email account |
|---|---|
| Who can do this | By default, Owners, Admins, and Editors. Your account Owner can change this in Roles & Permissions. |
| Before you start | At least one Verified sending domain, and your business postal address. |
| Time needed | About 2 minutes per address. |
A verified sending domain gives LeadCenter permission to send as your domain. A sending email address is the specific address your recipients actually see: the name and address in the From line, and where replies go. You can add as many as you need.
Before You Start
You need at least one Verified sending domain. The Add email address button stays greyed out until you have one. If you have not done this yet, start with Email Custom Sending Domain.
How to Add a Sending Email Address
- Click your name or profile picture in the top-right corner and select Settings.
- Open the Basic settings tab.
- Click Shared email account.
- Select LC email marketing.
- In the Sending email card, click Add email address.
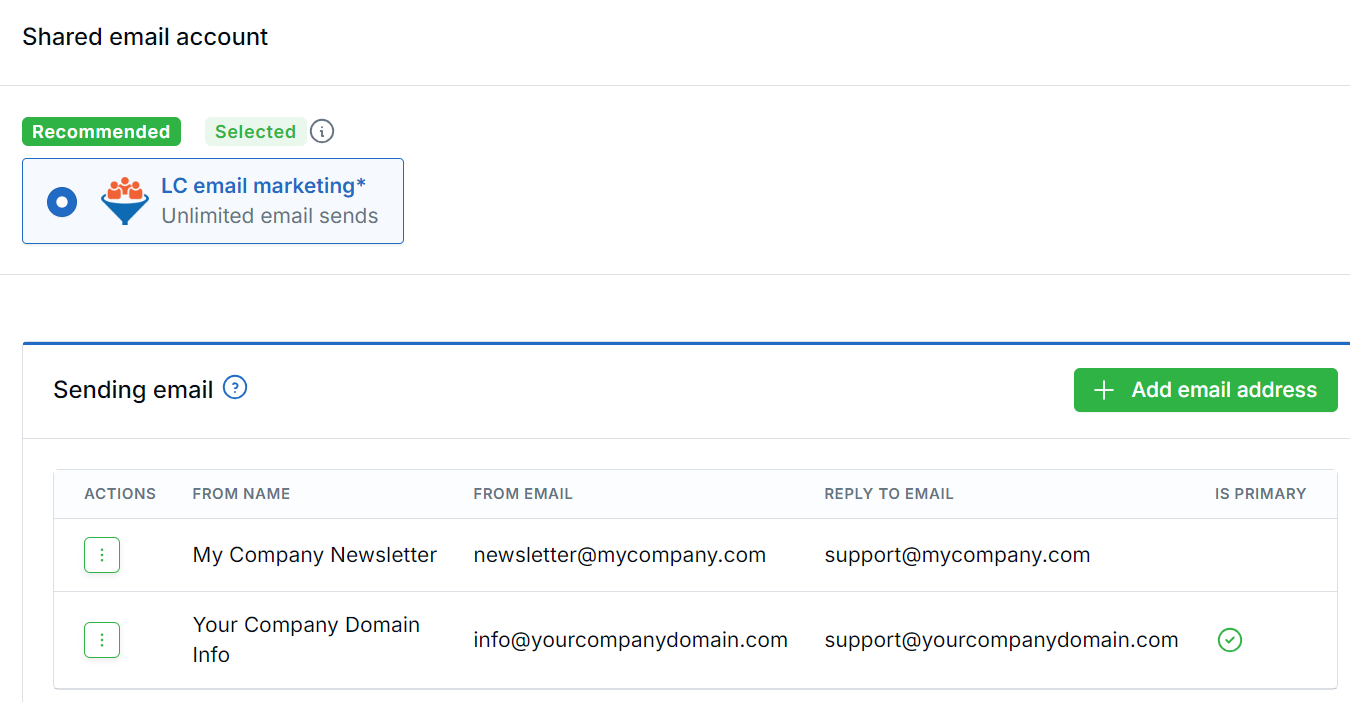
Click Add email address.
Fill in the Add a sending email window:
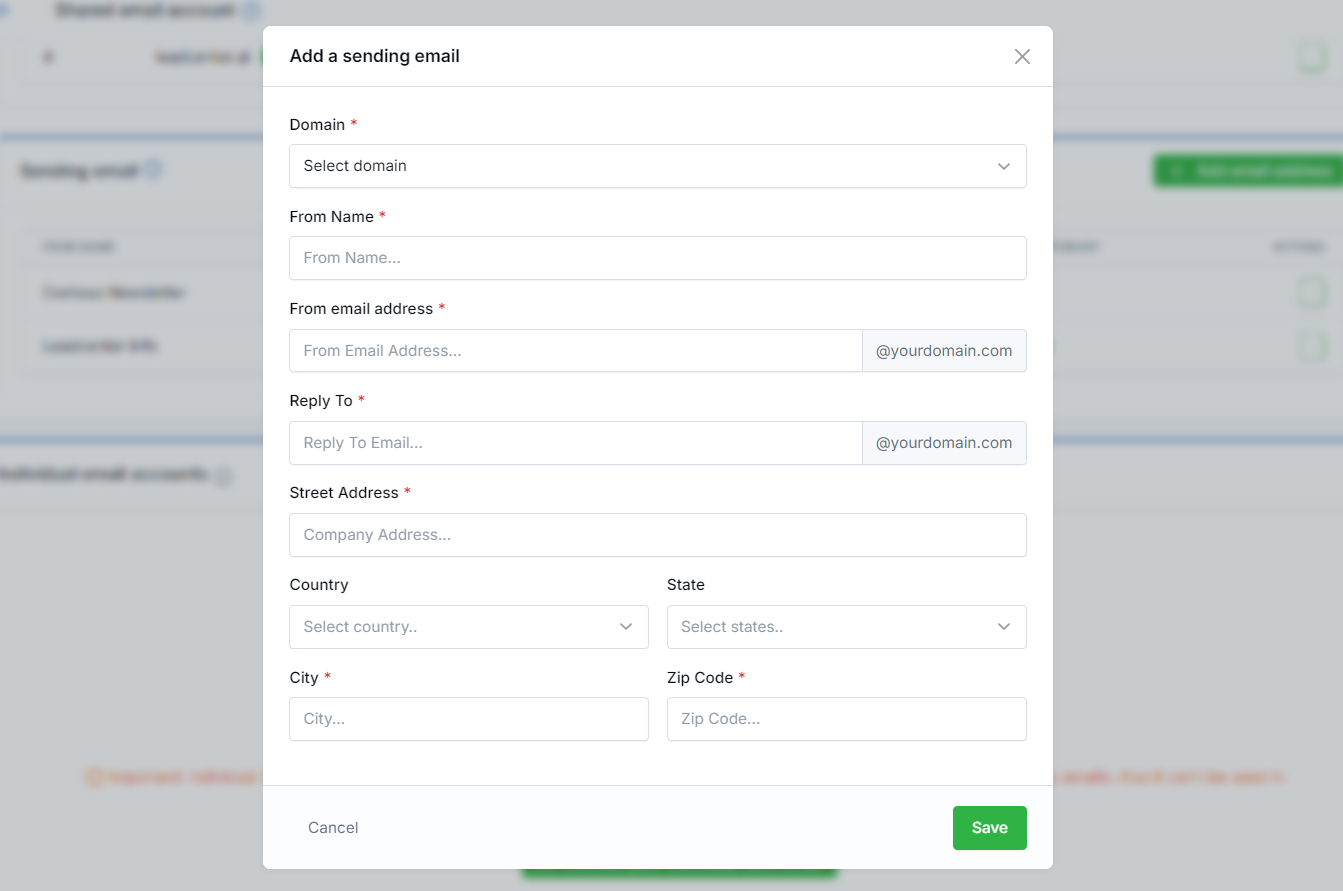
The Add a sending email window.
| Field | What to enter |
|---|---|
| Domain | Choose one of your verified domains. Only verified domains appear in this list. |
| From Name | The name recipients see. Use something they will recognize, such as your firm’s name or an advisor’s name. |
| From email address | The address the email comes from, on the domain you selected. |
| Reply To | Where replies land. This is the one people get wrong. See the warning below. |
| Street Address, Country, State, City, Zip Code | Your business postal address. This is a legal requirement on commercial email. See below. |
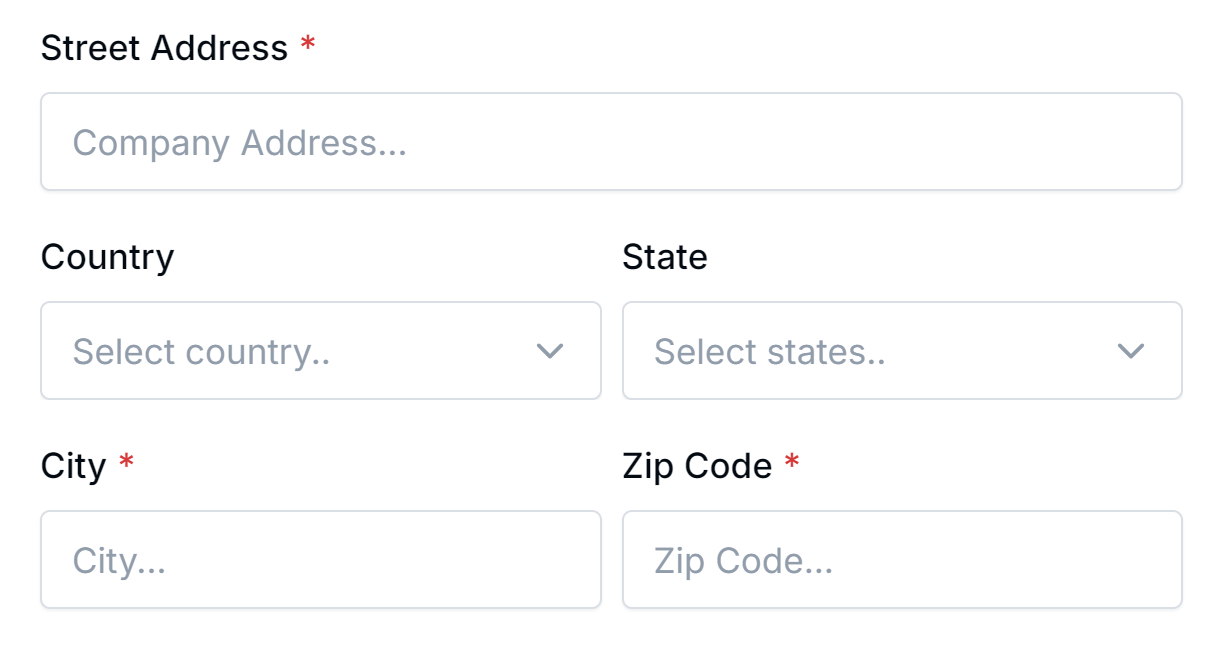
Enter your business postal address.
Click Save when you are done.
Get the Reply To address right. When a client replies to an email LeadCenter sent on your behalf, the reply goes to the Reply To address, which can be different from the From address. Point it at a mailbox someone actually monitors. A reply-to address nobody reads is the most common way client responses get lost.
Why the Postal Address Is Required
U.S. anti-spam law (CAN-SPAM) requires commercial email to include a valid physical postal address for the sender. LeadCenter adds the address on this record to your marketing emails. Use your street address, or a P.O. box registered with the U.S. Postal Service.
Managing Your Sending Addresses
Each address in the Sending email list has an actions menu (three dots) with these options:
- Edit mailing address: change the postal address shown in your marketing emails.
- Set signature: set the signature added to email sent from this address.
- Make primary: make this the address LeadCenter uses when no specific address is chosen. The primary address has a check mark in the Is primary column.
- Delete: remove the address.
Need to change the From name, From address, or Reply To? These cannot be edited after you save. Delete the address and add it again with the new details.
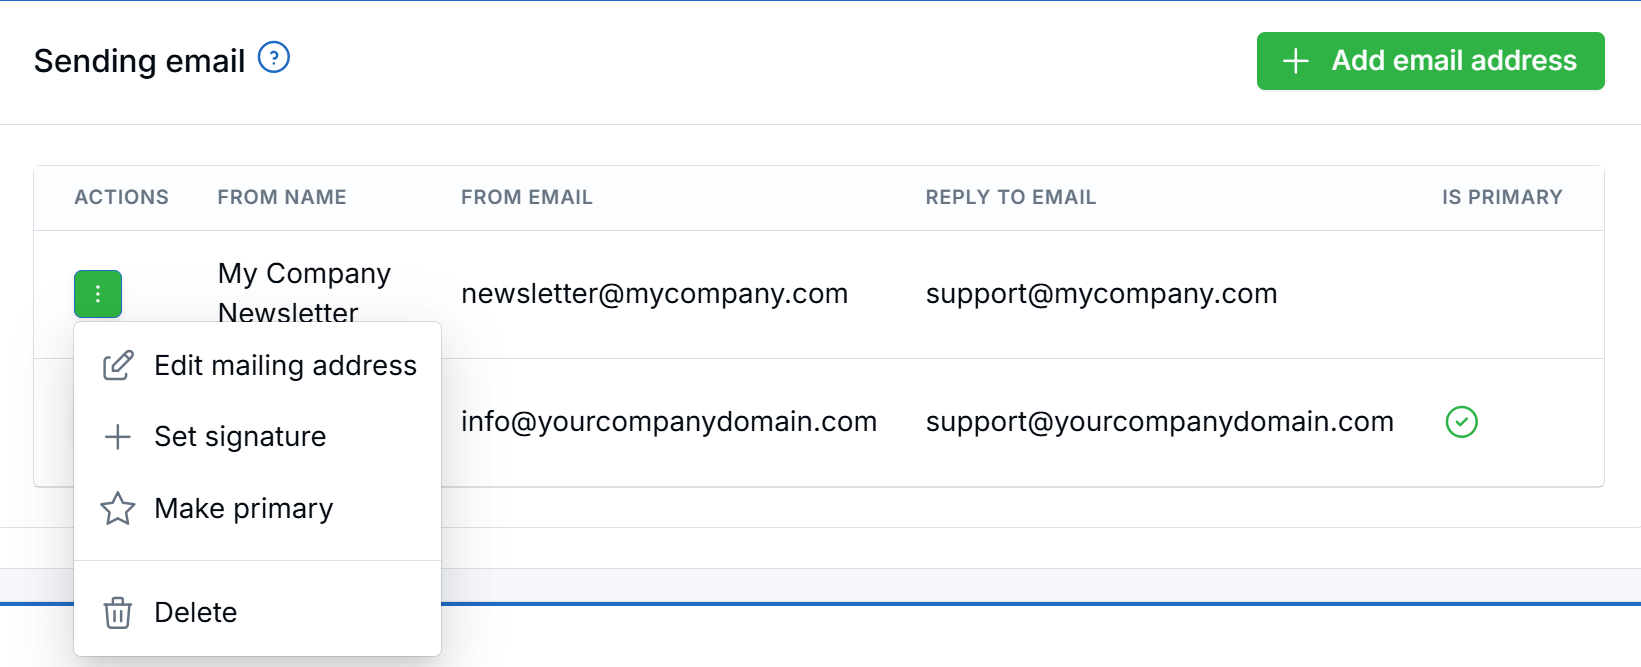
The actions menu on each sending address.
Where Your Sending Addresses Are Used
Once an address exists, LeadCenter can send from it for:
- Email marketing campaigns
- Workflow emails
- Appointment confirmations and reminders
- Event confirmations and reminders
- System and transactional email
Best Practices
- Point Reply To at a monitored mailbox. Test it by replying to one of your own emails and checking that it arrives where a person reads it.
- Use a From Name clients recognize. Your firm’s name or an advisor’s name earns opens. “No Reply” and “Marketing Team” do not.
- Use a postal address that can receive postal mail. It is a legal requirement and it appears on your marketing email.
- Set the primary sending address on purpose. LeadCenter falls back to it whenever no address is specified.
Troubleshooting
Add email address is greyed out
You have no verified sending domain yet, or the red activation banner is showing. Add and verify a domain first. See Email Custom Sending Domain.
My domain is not in the Domain dropdown
Only Verified domains appear. If yours still shows Pending Verification, finish verifying it first.
Clients say they replied but I never received it
Check the Reply To address on that sending address. Replies go there, not to the From address. To change it, delete the address and add it again with the right Reply To.
My emails go out with no signature
Signatures are set per sending address. Open the actions menu on the address and choose Set signature.
Frequently Asked Questions
Can the From address and the Reply To address be different?
Yes, and that is often the right choice. You might send from news@ while replies go to a monitored office@ mailbox.
Can I change the From name later?
Not directly. Delete the address and add it again with the new From name.
Do I need a separate address for each advisor?
Only if you want clients to see that advisor’s name in the From line. Otherwise one firm-wide address is simpler to manage.
Can I use an address on a domain I have not verified?
No. This is what keeps your email authenticated and out of spam folders.
What’s Next
Protect your domain from being spoofed: DMARC Security.
Need help? Email support@leadcenter.ai.

Need more help?
If you can't find the answers you're looking for, our support specialists are available to answer your questions and troubleshoot if necessary.
-
Phone Call (888) 291-7116. Our main hours are Monday to Friday 7 am-5 pm Central Time.
-
Support Send your questions and inquiries via email to support@leadcenter.ai. A support ticket will be created and one of our team members will get back to you as quickly as possible.