Contact Management
Contact Management
Creating and Saving Contacts filters
You can create and save filters in the Sales Pipeline, Contacts Dashboard and Financial Accounts. Filters allow you to view specific contacts or accounts based on defined criteria.
Saved filters offer quick access to desired data without reapplying filters each time you open these pages.
Filters in Sales Pipeline
There are five methods to filter data in the sales pipline
- Stages: Utilize the list of stages at the top.
- Contact created at date: Use the Date filter on upper right corner above the pipeline table.
- Sort by date created or updated: Use the sort filter next to the date filter.
- Saved filters: Access saved filters using the Saved filter button next to the sort filter.
- New filter: Add a new filter by clicking the Add filter button.
Creating and Saving New Filters
To create a new filter
- Click on the Add filter button above the sales pipeline table on the right side. This will open the Filters pane on the right.
- In the Filters pane, you can filter data based on common fields like Stage, Source, Tag, etc.
- To access more options, click on the Advanced filters button at the bottom. This will open the Advanced contacts filter page, where you can:
- Choose a Saved Segment: Select a previously created segment. To create new segments, navigate to the Segments page.
- Create a one-time use segment: This segment will be used only for this filter.
Creating advanced filters with one-time use segments
To create a one-time use segment:
- Click on the Create one-time use segment button to open the filtering page.
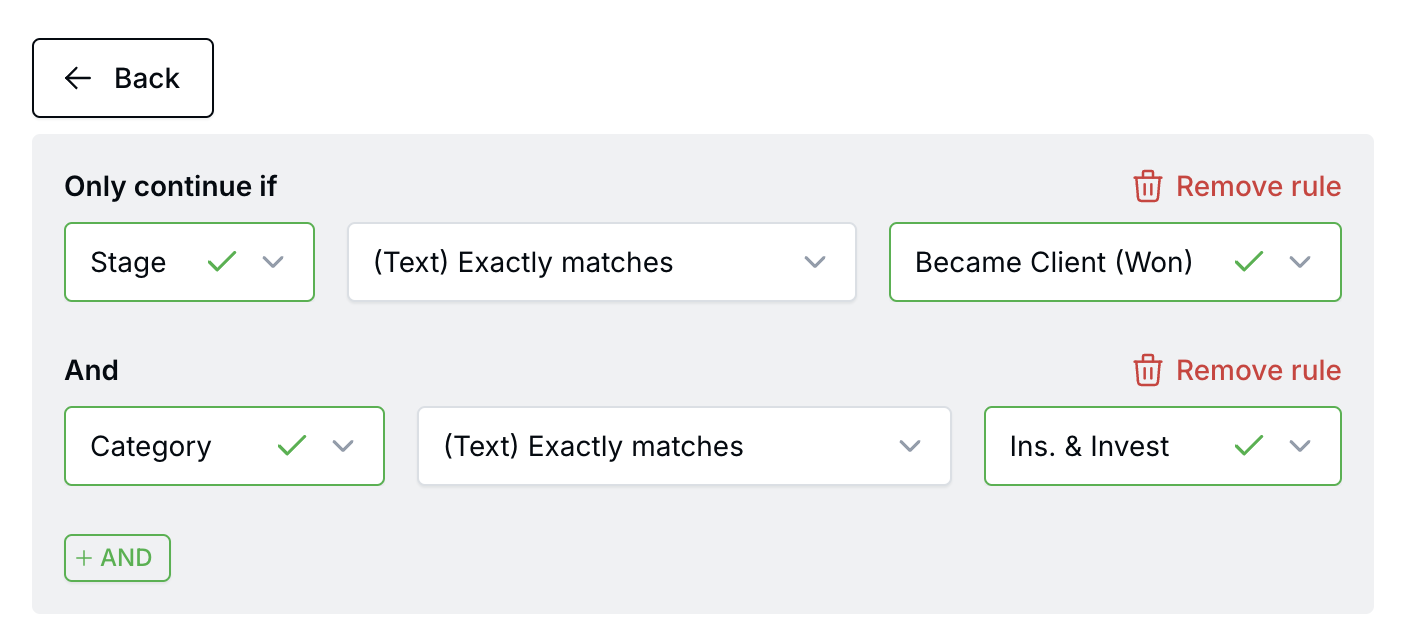
- Add multiple fields with AND or OR conditions.
For example, to create a filter where:
Set up the filters as shown below:

Click on the Apply button to apply the filter. The Sales Pipeline or Contacts Dashboard will display data based on the selected filters. The applied filters will appear at the top of the page, as shown below:

To save the filter:
- Click on the Save button. This will open the Save Filter box.
- Enter a name for the filter.
- Optionally, mark the filter as Private so only you can view it within your organization.
- Click on the Save button to confirm.
To apply a saved filter:
- Click on the Saved filter button.
- Select the desired filter from the dropdown list.
How to delete a saved filter
- Click on the Saved Filter button to open the dropdown menu.
- Locate the filter you want to delete.
- Click on the Delete button next to the filter name to remove it permanently.

Need more help?
If you can’t find the answers you’re looking for, our support specialists are available to answer your questions and troubleshoot if necessary.
-
Phone Call (888) 291-7116. Our main hours are Monday to Friday 7 am-5 pm Central Time.
-
Support Ticket Send your questions and inquiries via email to support@leadcenter.ai. A support ticket will be created and one of our team members will get back to you as quickly as possible.
