 Help Center
Contact Management
Contact Management
Note Templates
Note templates in LeadCenter.AI allow you to create predefined note structures for common client interactions. By using templates, your team can ensure consistency, save time, and streamline documentation across client records.
Creating a New Note Template
-
Click "+ New Template"
A new note template creation form will appear.
-
Enter a Template Name
Provide a clear and descriptive name for the template. This helps you quickly identify it when adding notes.
-
Select a Template Category and Note Category
Note Templates has two separate category fields. Template category (Appointments, Call Scorecards, Call Summaries, Events) organizes the template itself in the templates list. Note category (for example, "1st Visit - Not a Client") is the category applied to the note when the template is used.
-
Compose the Note Content
Write the default note content that will appear when this template is used.
- Use placeholders or predefined text to ensure consistency.
- Users can modify the content when applying the template to a note.
Tip: Keep note content concise and relevant—users can always add more details when applying the template.
-
Tag Users (Optional)
Use "@" followed by the user’s name to tag specific team members.
Tip: Tagged users will be notified when the note template is used in a note, ensuring timely follow-up.
-
Click "Save"
The template will now be available for use when creating notes.
Writing and Improving Note Templates with AI
Troy AI can draft a new note template from scratch or improve the content already in the Notes field.
-
Open the Troy AI menu
In the note template editor, click Troy AI.
-
Choose an action
Select New note template to draft a new template, or choose Enhance with AI, Formalize, Polish, Elaborate, Shorten, or Compliance check to revise content already in the Notes field.
-
Describe what you need
In the Troy AI Note Builder panel, choose a suggested prompt or describe the note structure you want in the message box, then send it.
-
Review and apply the result
Select Use in draft to replace the Name and Notes fields with the generated content, or Add to draft to append it to what is already there.
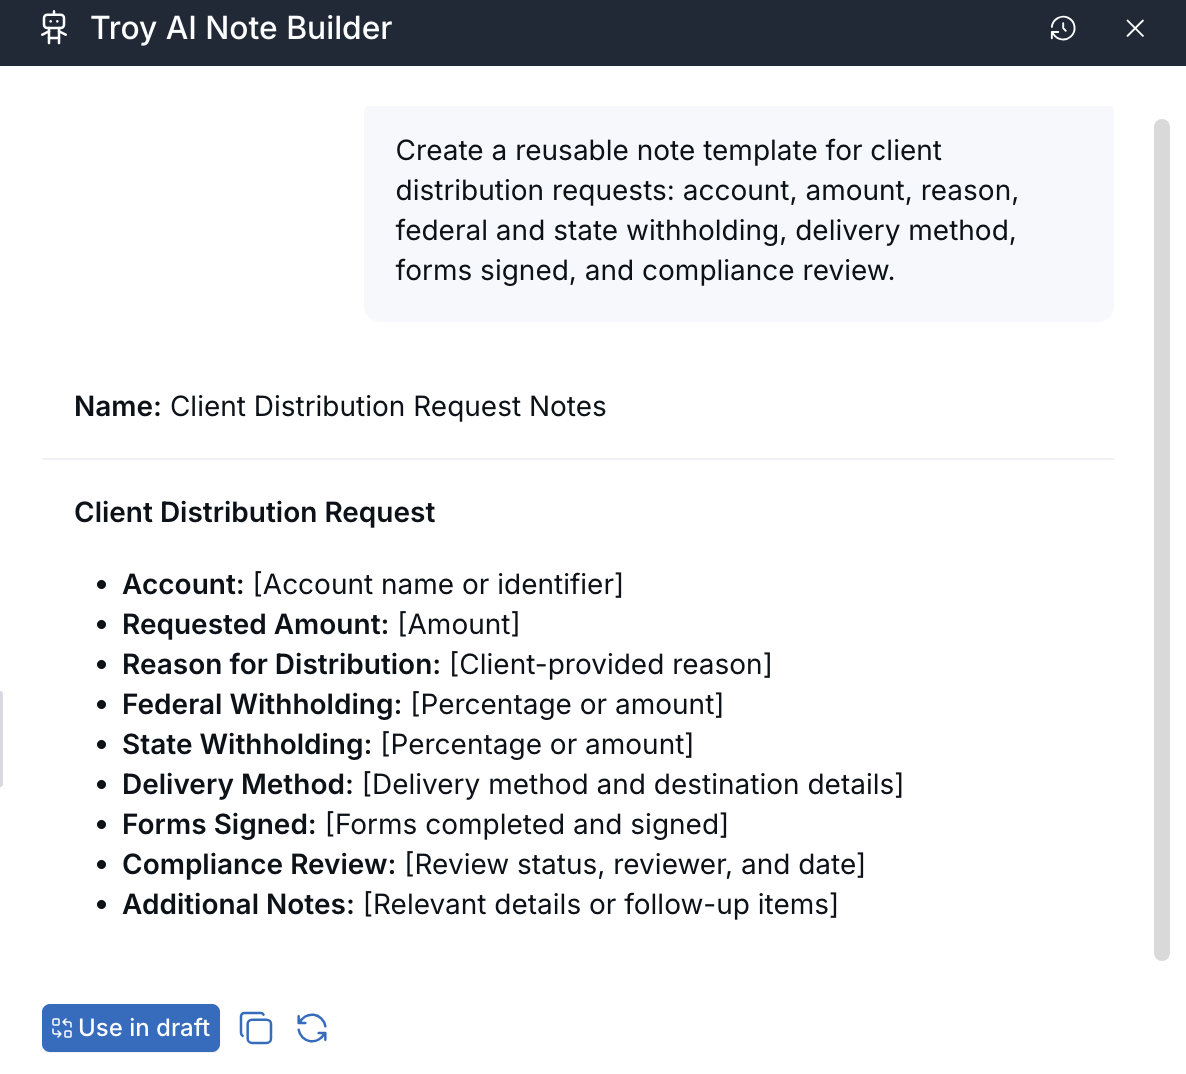
Review the draft, then apply it to your template.
-
Finish and save
Complete the template name and categories, review the AI-generated content, then click "Save".
Tip: Always review AI-generated content before saving, since note templates are reused across many contacts.
Using a Note Template
To apply a note template while creating a note, select a template from the "Template" dropdown. The note content will auto-fill with the predefined text, which you can modify if needed.
Tip: Learn more about applying note templates and managing notes in the Notes Help Article.
Managing Note Templates
Review When Templates Were Updated
Switch to table view in the note templates list to compare when each template was created and most recently updated:
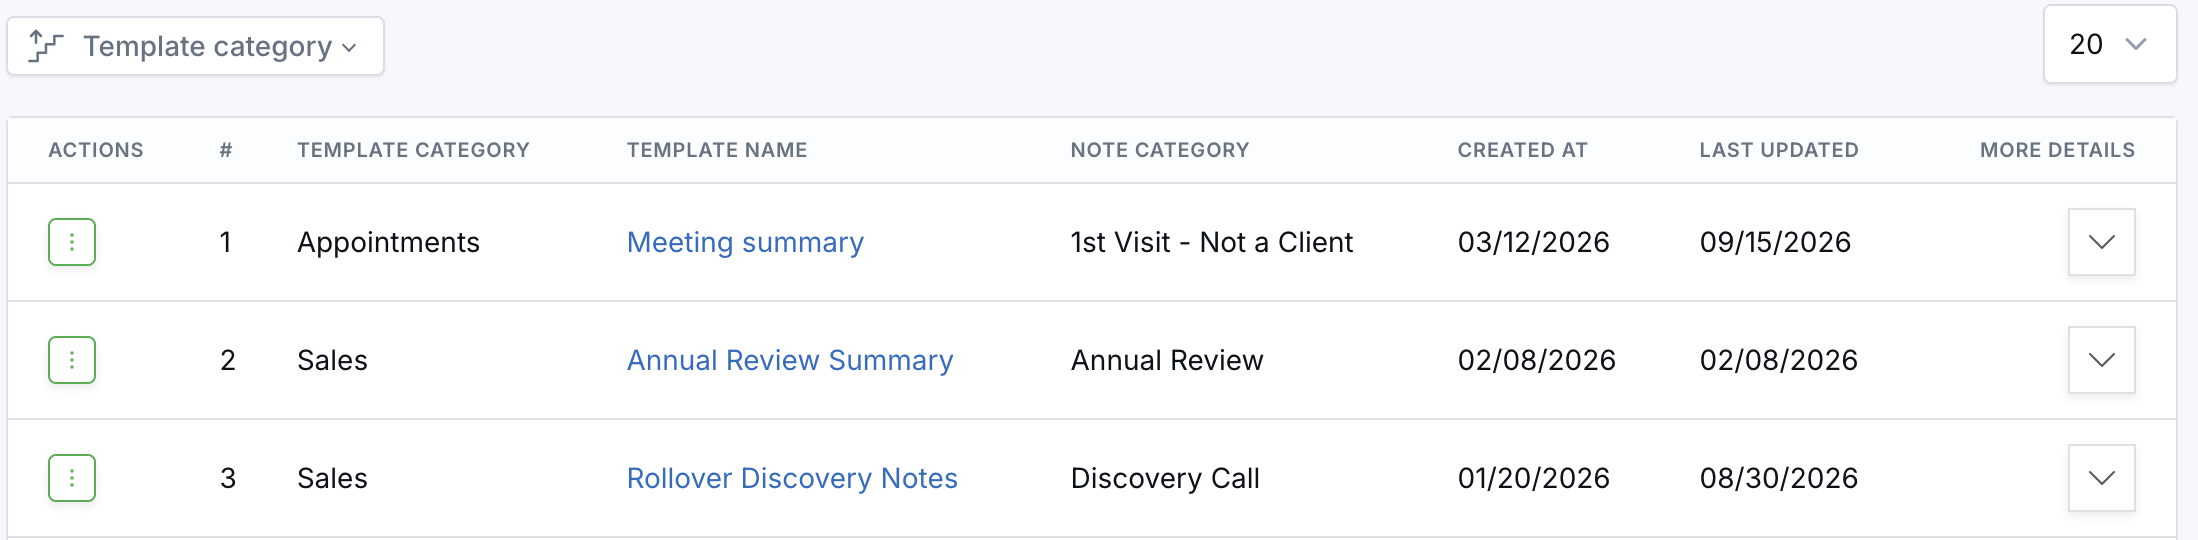
- Created At shows when the template was first saved.
- Last Updated shows when the template was most recently saved.
If a template has not been changed since it was created, the two dates match.
Editing a Note Template
Find the template you want to update in the note templates list.
Click the three-dot menu next to the template.
Select Edit, update the necessary fields, and click Save.
Deleting a Note Template
Find the template you want to delete in the note templates list.
Click the three-dot menu next to the template.
Select Delete and confirm the action.
Best Practices for Note Templates
- Use clear and specific template names for easy identification.
- Organize templates by category to quickly find the right one for your needs.
- Use "@" to tag relevant team members when necessary to ensure prompt follow-up.
- Regularly review and update templates to keep them relevant.
Need Help?
If you have any questions or need assistance, contact LeadCenter Support at support@leadcenter.ai.

Need more help?
If you can't find the answers you're looking for, our support specialists are available to answer your questions and troubleshoot if necessary.
-
Phone Call (888) 291-7116. Our main hours are Monday to Friday 7 am-5 pm Central Time.
-
Support Send your questions and inquiries via email to support@leadcenter.ai. A support ticket will be created and one of our team members will get back to you as quickly as possible.