 Help Center
Calendars & Appointments
Calendars & Appointments
Appointment Templates
* Page referenced in this article: Appointment Templates page.
Appointment templates let you save commonly used appointment setups so you can create new appointments faster and more consistently. Instead of entering the same details each time, you can choose a template and let LeadCenter pre-fill the appointment form for you.
What an Appointment Template Can Include
Each template can store default values such as:
- Name — the template name used internally
- Subject — the client-facing appointment subject
- Internal subject — an optional internal-only subject for your team
- Description — appointment notes or meeting details
- Meeting location — in person, phone, Zoom, Google Meet, Teams, or another location type
- Category — the appointment category assigned to the meeting
- Importance and priority
- Confirmation email template
Note: The Internal subject field requires Internal Subject to be enabled on the calendar.
Use Shortcodes in a Template
Add shortcodes to the Subject, Internal subject, or Description. When you select a contact on a new appointment, LeadCenter replaces the shortcodes with that contact's details.
- Open the Appointment Templates page.
- Create a template or open an existing template.
- Click Shortcodes next to Save.
-
Copy the shortcode you need, such as
[[full_name]],[[first_name]], or[[company]]. Some groups appear only after you select an appointment or event type. -
Paste it into Subject, Internal subject, or Description. For example:
[[full_name]]: Strategic Planning. - Click Save.
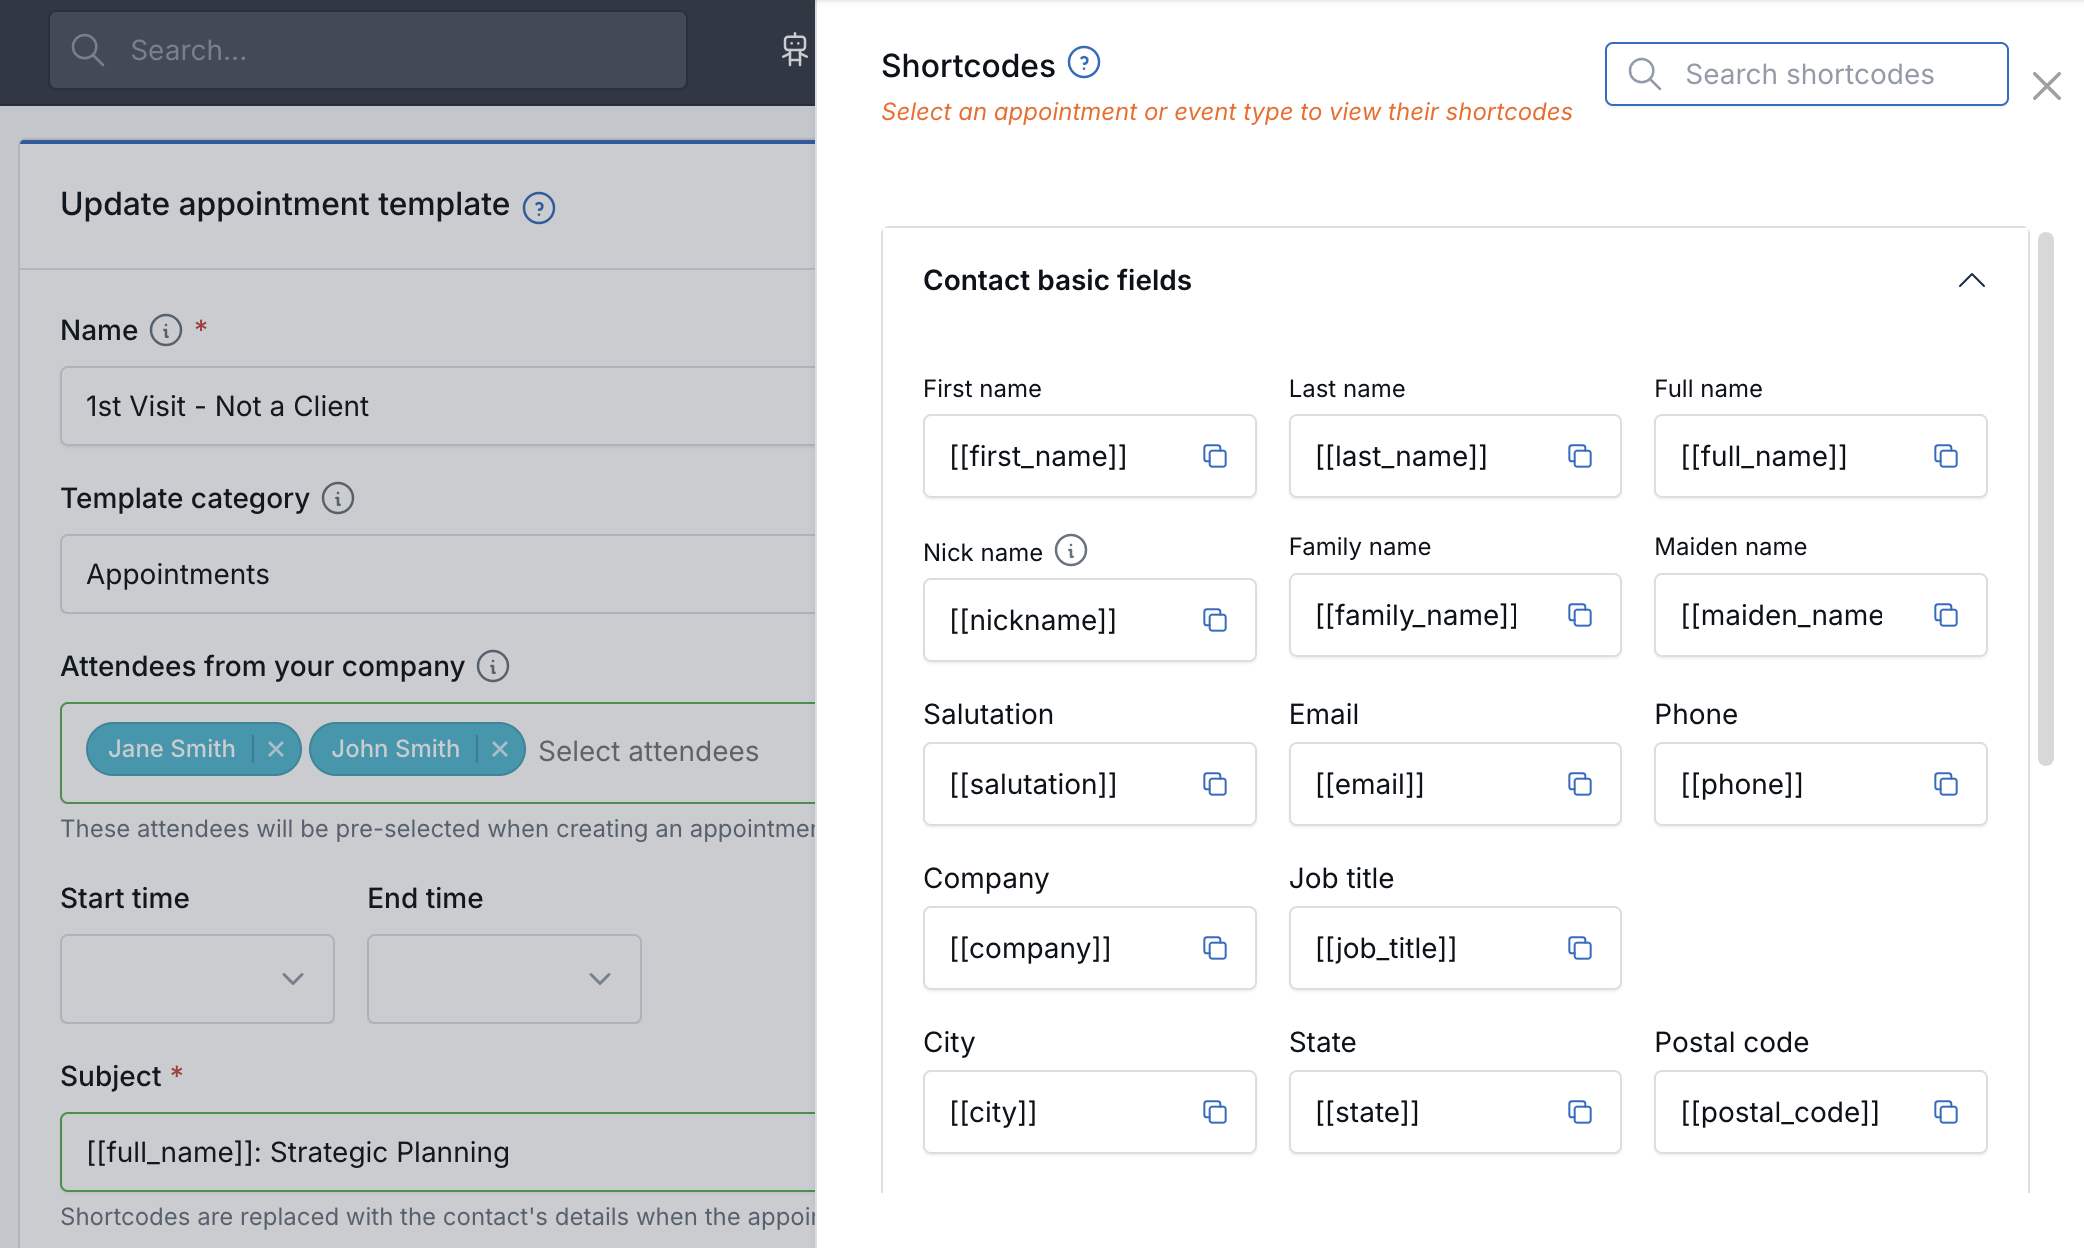
Shortcodes fill in when you select the contact. If you select the template first,
they stay visible as [[first_name]] until a contact is chosen. Any
wording you type over the template text is kept, and existing appointments are not
changed. If no contact is selected, the shortcode remains in the saved appointment.
-
Anything in Subject appears on the client calendar invitation.
Take care with fields such as
[[email]],[[phone]], and[[address]]. - Use Internal subject when the details should be visible only to your team. Internal subject must be enabled on the calendar.
Why Use Appointment Templates
- Save time when scheduling common meeting types
- Keep appointment setup more consistent across your team
- Reduce mistakes caused by manually re-entering the same settings
- Standardize categories, meeting locations, and confirmation templates
Creating a Template
- Go to the Appointment Templates page using one of these paths:
- Marketing Dashboard → Templates → Appointments
- Settings → Workflows and Templates → Appointment Templates
- Click Create Template.
- Fill in the template details.
- Click Save.
Save Company Attendees on a Template
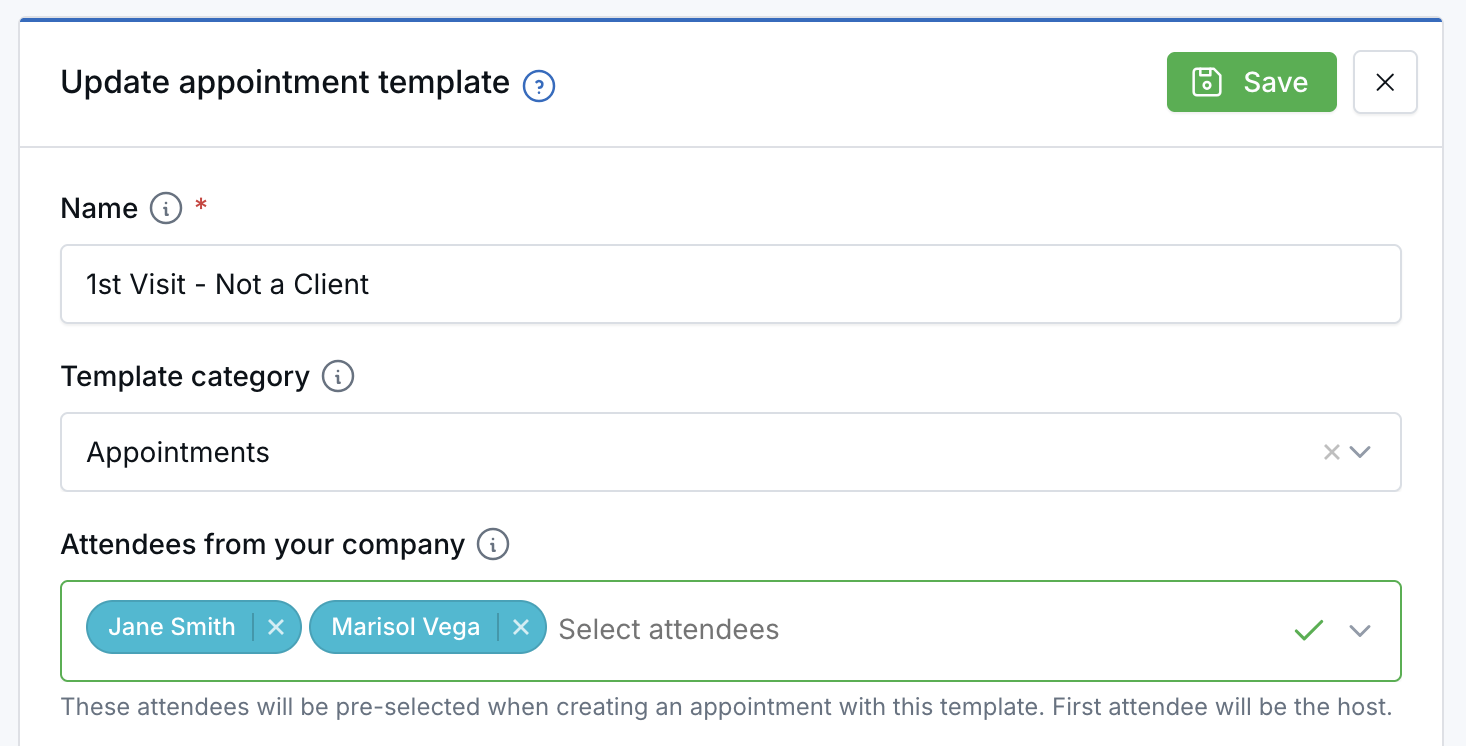
Appointment templates can store company attendees. When the template is used, those team members are selected on the appointment automatically.
- Create a new appointment template or open an existing one.
- Find Attendees from your company.
- Select one or more team members.
- Place the intended meeting host first. The first attendee becomes the host.
- Complete the remaining template fields and click Save.
Use the Attendees on an Appointment
When you select the template while creating an appointment, its company attendees are added to the appointment. You can add, remove, or reorder attendees before saving.
Deactivated Team Members
- Deactivated users are removed from templates and do not appear in the attendee picker.
- If active attendees remain, only those attendees are added to new appointments.
- If no saved attendees remain active, the appointment keeps its default host.
- Reactivating a user does not add them back to existing templates automatically.
Template attendees are optional. Editing the template does not change appointments that were already created from it.
How to Use an Appointment Template
When creating a new appointment from the calendar:
- Select a template from the template dropdown.
- The appointment form is filled in automatically using that template’s saved values.
- Review the appointment details.
- Change any field you want before saving the appointment.
Using a template does not lock the appointment form. You can still override any pre-filled field before saving.
Duplicate an Appointment Template
Duplicate an existing template when you need a similar meeting setup. The original remains unchanged while you edit the new copy.
- Go to Appointment Templates.
- Find the template you want to copy.
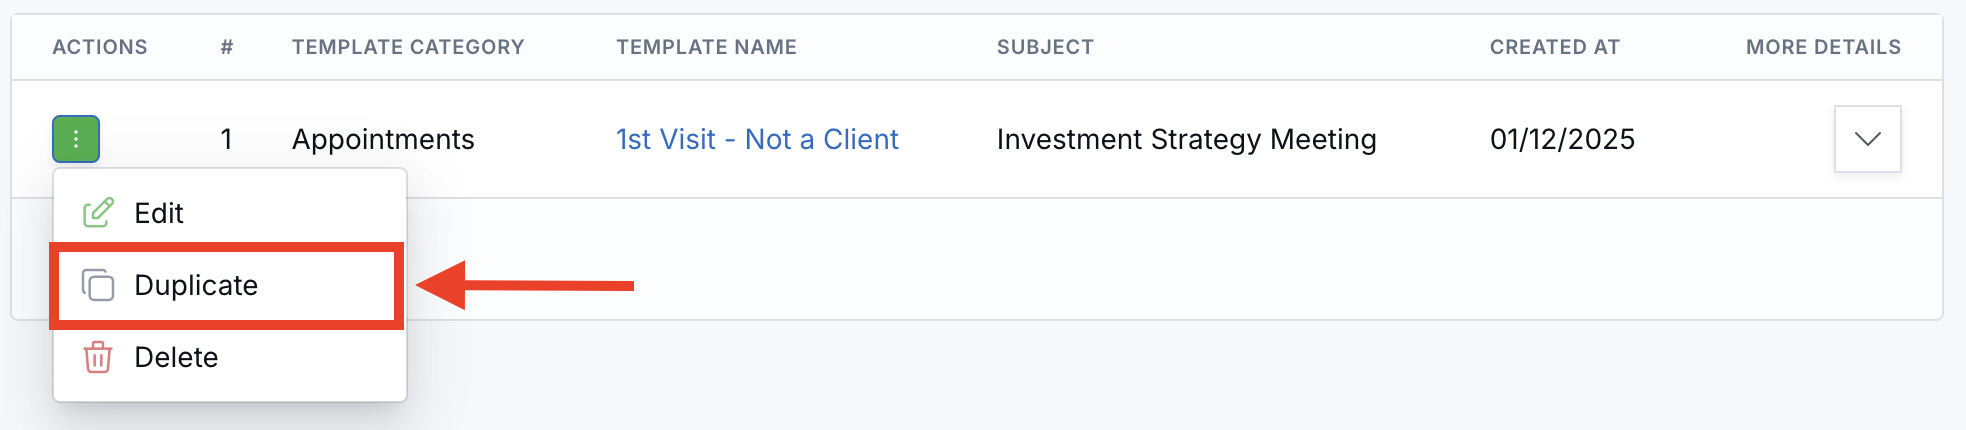
- Open the row’s Actions menu.
- Select Duplicate.
- Update the new template’s name and any other fields.
- Click Save.
How Copies Are Named
- The first copy uses Original Name (Copy).
- Additional copies use (Copy 2), (Copy 3), and later numbers.
What Is Copied
- Subject, internal subject, description, categories, importance, and priority
- Meeting location and expected start and end times
- Company attendees saved on the template
- Confirmation email template and linked workflow, when present
Duplicate requires permission to create appointment templates.
Review the attendees and confirmation email template before saving, especially when the copy will be used for a different meeting type.
Managing Appointment Templates
- Edit — update the template at any time
- Delete — remove templates you no longer use
- Filter — use the category filter on the templates page to find templates more quickly
Important: Changes to a template affect only future appointments created from that template. Existing appointments are not updated automatically.
Best Practices
- Create templates for your most common meeting types
- Use clear template names so your team can choose the right one quickly
- Review templates periodically to keep subjects, meeting locations, and confirmation emails current
- Use internal subjects when you want internal notes that clients should not see
Related Articles

Need more help?
If you can't find the answers you're looking for, our support specialists are available to answer your questions and troubleshoot if necessary.
-
Phone Call (888) 291-7116. Our main hours are Monday to Friday 7 am-5 pm Central Time.
-
Support Send your questions and inquiries via email to support@leadcenter.ai. A support ticket will be created and one of our team members will get back to you as quickly as possible.