 Help Center
Calendars & Appointments
Calendars & Appointments
Calendar Settings Basic Details
* Page referenced in this article: calendar basic settings page.
Calendar name and Picture
The calendar name and profile picture will be shown in public calendar links. Please note that if you change your picture here, it will change your personal account profile picture in LeadCenter.
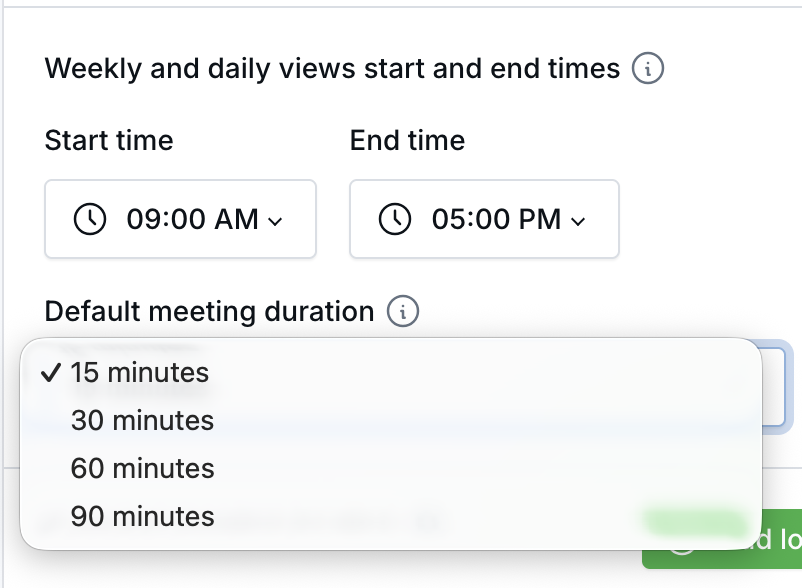
Weekly and Daily Views Start and End Times
This will control the start and end times in the internal calendar's weekly and daily views. If you have a meeting before or after the selected time here, it will not show in daily and weekly view. But it will show in monthly view.
Important: those settings will not affect free\busy schedule in public calendars. This is just the view of internal calendar.
Default Meeting Duration
Choose the default length LeadCenter uses when you create an appointment with a contact or an internal meeting. Available durations are 15, 30, 60, and 90 minutes. Calendars use 60 minutes until another value is selected.
- Open Calendars, then select the gear icon (Calendar Settings) next to Create.
- Open Basic details.
- Under Weekly and daily views start and end times, select a Default meeting duration.
- Select Save.
After you select a start time for a new meeting, LeadCenter fills in the end time using the host calendar's default duration. You can change the end time before saving.
- You can't change the host once an appointment is saved. On a new, unsaved appointment, changing the host doesn't immediately recalculate the end time — change the start time to apply the new host's duration.
- Clicking and dragging a time range on the calendar keeps the selected range.
- Existing meetings keep their saved duration when opened for editing.
- Time blocks, client review reminders, and public BookMyTime slot lengths do not use this setting.
Meeting Locations
In this section you configure the meeting details available on this calendar when you create an appointment. These details can also be used when this calendar is selected as the host for a booking.
- In Person Meeting Location. If you have multiple offices, you can add locations by clicking the Add Location button.
- One phone number.
- Zoom meeting. Connect your Zoom account.
- Other virtual meeting links.
Shared calendars: To choose which meeting types appear on a shared calendar booking page, go to Setup → Calendar → Shared Calendars, open the shared calendar, and use its Meeting location section.
Important: For in-person appointments synced with Microsoft Outlook, it is best to select a real in-person location from the dropdown whenever possible. If an in-person appointment has no selected location, LeadCenter sends a blank location to Microsoft instead of using misleading placeholder text.
This helps calendar events, reminders, confirmations, and update emails reflect the correct meeting details more accurately. If you have older appointments that already show incorrect in-person meeting details, edit the appointment and select the correct location to update it.
Weekly appointments with contacts limit
This will limit the number of appointments clients can book with you each week. Leave blank for unlimited, alternatively make sure to check the Allow booking over weekly limit checkbox.
This feature is used in Advisors Capacity Report to show the advisor utilization capacity per week.
This feature will impact availability in public calendar. If you exceed the weekly limit and Allow booking over weekly limit is not checked, contacts will not be able to book appointments with you in that week using public calendar. This feature will not impact appointments booked directly inside LeadCenter calendar.

Need more help?
If you can't find the answers you're looking for, our support specialists are available to answer your questions and troubleshoot if necessary.
-
Phone Call (888) 291-7116. Our main hours are Monday to Friday 7 am-5 pm Central Time.
-
Support Send your questions and inquiries via email to support@leadcenter.ai. A support ticket will be created and one of our team members will get back to you as quickly as possible.