 Help Center
Calendars & Appointments
Calendars & Appointments
Time Blocks with Contacts
Time Blocks can optionally be associated with a contact to help you organize internal work by client. This allows you to tie preparation, research, or follow-up time to a specific contact — while keeping time blocks strictly internal.
Important: Time blocks never send emails, reminders, or calendar invites. Even when a contact is selected, clients will never be notified or see the time block.
What Time Blocks with Contacts Do
- Optionally link a contact to a time block for internal context
- Display the time block in the contact’s Appointments tab
- Clearly mark the entry with a Time Block badge
- Keep all time blocks internal and hidden from clients
Creating a Time Block with a Contact
Option 1: From the Calendar
- Go to Calendars.
- Click on the calendar to create a new Time Block.
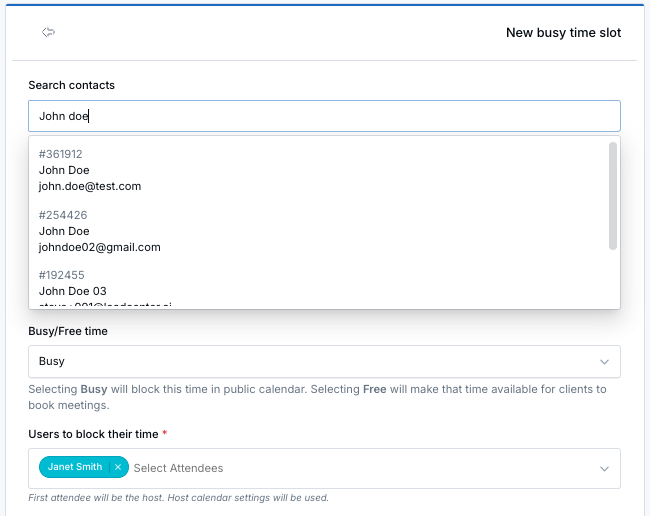
- In the form, use the Search contacts field to select a contact (optional).
- Enter the time block name, date, and time.
- Choose whether the time block is marked as Busy or Free.
- Click Save.
Option 2: From a Contact’s Appointments Tab
- Go to Contacts and open the contact.
- Open the Appointments tab.
- Click the Create dropdown.
- Select Time Block.
- The contact will be automatically pre-filled.
- Complete the time block details and click Save.
How Time Blocks Appear in Contact History
When a contact is linked to a time block, it appears in the contact’s appointment history.
- Open the contact.
- Go to the Appointments tab.
- The entry will display with a Time Block badge in the type column.
This makes it easy to see internal work related to a contact alongside real client appointments.
Time blocks can be linked to a contact for internal tracking and are always marked as “Time Block”. No client notifications are ever sent.
Editing or Removing the Contact
You can update the contact association at any time:
- Add a contact: Edit the time block and select a contact.
- Change the contact: Remove the current contact and select another.
- Remove the contact: Click the X next to the selected contact.
No Client Notifications (Always)
Contacts linked to time blocks will not receive:
- Confirmation emails
- Reminder emails
- Google Calendar invites
- Outlook or Microsoft calendar invites
- Reschedule or cancellation notifications
This makes time blocks ideal for internal work related to a client without any external communication.
Common Use Cases
- Pre-meeting preparation
- Post-meeting follow-up work
- Client research or planning
- Internal coordination tied to a specific contact
Time Blocks vs Appointments
| Feature | Appointment | Time Block |
|---|---|---|
| Contact required | Yes | No (optional) |
| Client notifications | Yes | No (never) |
| Visible to client | Yes | No |
| Blocks calendar availability | Yes | Yes (when set to Busy) |
| Shows in contact history | Yes | Yes (when contact is selected) |
Best Practices
- Use contact-linked time blocks to organize internal work by client.
- Use Busy to prevent public booking during the block.
- Remember that time blocks are always internal and client-safe.
Need Help?
Contact LeadCenter Support at support@leadcenter.ai.

Need more help?
If you can't find the answers you're looking for, our support specialists are available to answer your questions and troubleshoot if necessary.
-
Phone Call (888) 291-7116. Our main hours are Monday to Friday 7 am-5 pm Central Time.
-
Support Send your questions and inquiries via email to support@leadcenter.ai. A support ticket will be created and one of our team members will get back to you as quickly as possible.