 Help Center
Integrations
Integrations
Sync Appointments with Zapier
Use Zapier to automate appointment activity between LeadCenter and other apps. This can help keep calendars, spreadsheets, notifications, and follow-up tools in sync when appointments are booked, updated, or cancelled.
What You Can Automate
LeadCenter supports Zapier triggers and actions for appointment workflows.
- New Appointment starts a Zap when a regular appointment is created in LeadCenter.
- Updated Appointment starts a Zap when a regular appointment is changed or cancelled in LeadCenter.
- Create Appointment books a meeting in LeadCenter from another app.
- Update Appointment changes appointment details such as subject, time, guests, notes, or status.
- Cancel Appointment cancels a meeting with an optional reason and cancellation emails.
- Find Appointment looks up a meeting so a later Zap step can update or cancel the correct appointment.
Which Appointments Start a Zap
Zapier is notified when regular appointments are created, updated, or cancelled in LeadCenter.
The following appointment activity does not start a Zap:
- Recurring appointments, such as repeating series
- Blocked time or other non-meeting calendar items
- Meetings that only synced in from Google Calendar or Microsoft Outlook and were not created or owned in LeadCenter
- Appointments created or changed by a Zapier action, including Create Appointment, Update Appointment, and Cancel Appointment
Appointments created or changed by Zapier do not trigger additional New Appointment or Updated Appointment Zaps. This helps prevent automation loops.
If you edit or cancel a LeadCenter-owned appointment inside LeadCenter, the Updated Appointment Zap can still run as usual, including when the meeting is cancelled.
How Calendar Sync Works
When Zapier creates, updates, or cancels an appointment in LeadCenter, LeadCenter can push that change to connected calendars the same way it does when appointments are booked from LeadCenter.
This can include connected calendars such as Google Calendar, Microsoft Outlook, and Redtail when those integrations are linked for your firm.
- LeadCenter to Zapier: New, updated, or cancelled LeadCenter appointments can start your Zaps.
- Zapier to LeadCenter to your calendars: Appointments created, changed, or cancelled from Zapier are saved in LeadCenter and can sync to connected calendars.
Create an Appointment from Zapier
To create an appointment from Zapier, the required fields are:
- Subject
- Host Calendar
- Start Time
- End Time
Other useful fields include:
- Time Zone: If left empty, LeadCenter uses your app time zone setting.
- Send Confirmation Emails: Defaults to off unless you turn it on.
- Guest Emails: Outside attendees, entered as comma-separated email addresses.
- Attendees from Your Company: Team members whose calendars should be included on the meeting.
- Meeting Type, Location, or Join Link: Optional meeting details.
- Description, Internal Subject, and Notes: Additional appointment details.
- Linked Contact: Optional Contact ID, or contact details used to create or link the appointment.
- Importance: Low, Medium, or High.
- Priority: 1 through 6.
- Status: Appointment status, such as Tentative, Confirmed, or Completed.
- Mark as Busy: Defaults to on. Turn it off to keep the time free.
- All Day, Private, and Spouse Included: Default to off.
After an appointment is created, the host calendar cannot be changed. To switch hosts, cancel the appointment and create it again with the correct host calendar.
Update an Appointment from Zapier
To update an appointment, Zapier needs the Appointment ID. Use Find Appointment first if you do not already have it.
Leave fields empty when you want to keep the current appointment values. You can update details such as the subject, time, guests, status, and notes.
Turn on Send Update Emails only when you want contacts to receive an update email. This setting defaults to off.
Cancel an Appointment from Zapier
Use the Cancel Appointment action when a meeting should no longer happen.
Provide the Appointment ID, add an optional cancellation reason, and choose whether to send cancellation emails. Cancellation emails default to off.
Connected calendars can still be updated even when cancellation emails are turned off.
You can also set Status to Cancelled with the Update Appointment action, but Cancel Appointment is the clearer option when the meeting is no longer happening.
Find an Appointment
Use Find Appointment when a later Zap step needs to update or cancel an existing appointment.
Search with at least one of the following:
- Appointment ID
- Contact ID
- Subject
- Start Date / Time
The Start Date / Time field is flexible:
- Date only: Finds appointments that start on that day.
- Date and time: Finds appointments that start around that time.
If more than one appointment matches, LeadCenter returns the most recent match. If nothing matches, Find Appointment returns empty rather than an error.
For more accurate results, combine Contact ID with a date or subject when someone has several meetings.
Getting Started
- Connect LeadCenter in Zapier using the credentials from Integrations > Zapier.
- Create a Zap and choose LeadCenter.
- Select the trigger or action you want to use.
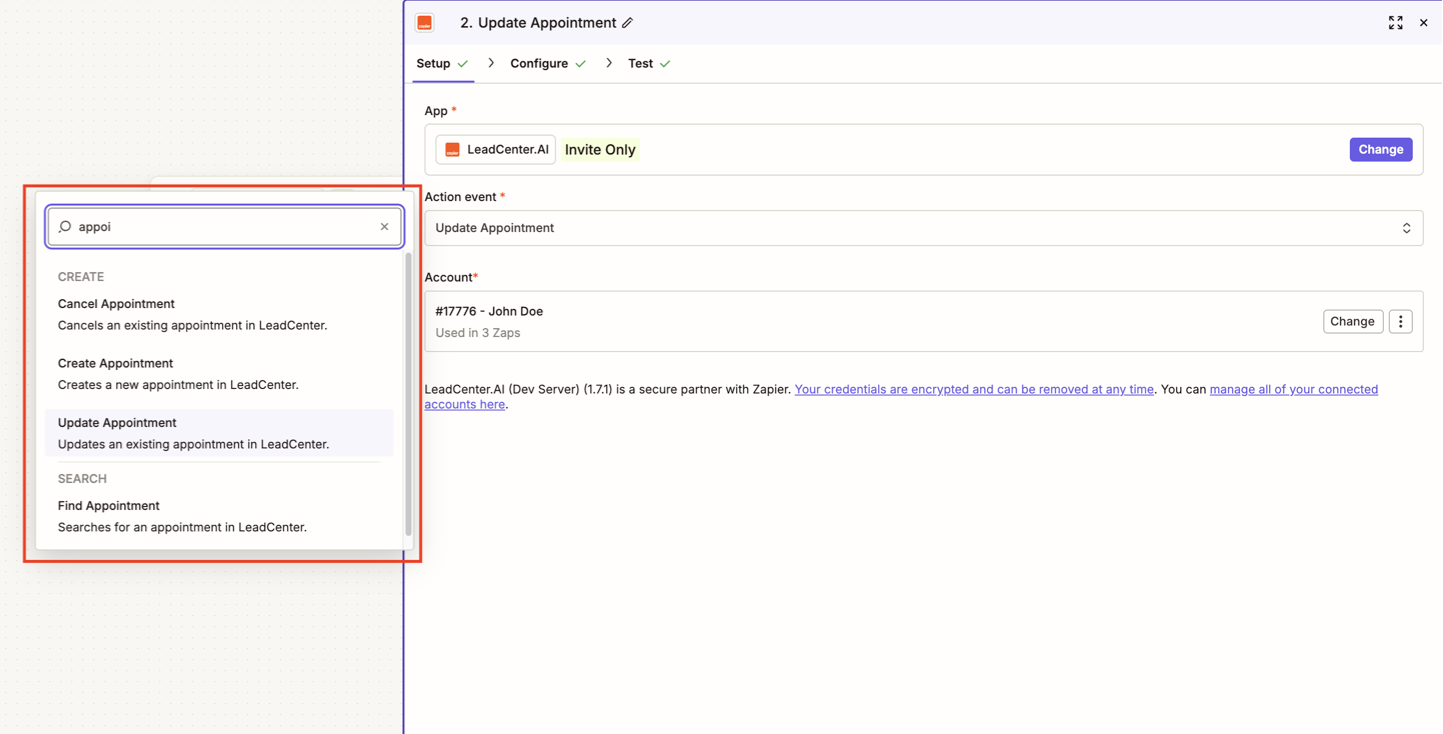
- Map the appointment fields needed for your workflow, including email settings, guests, team attendees, and time zone when relevant.
- Turn on the Zap and test it with a real appointment.
Tips for Reliable Appointment Zaps
- Use Find Appointment before Update Appointment or Cancel Appointment when you do not already have the Appointment ID.
- Use Guest Emails for outside people and Attendees from Your Company for team members' calendars.
- Appointment emails default to off. Turn them on only when you want invitations, update emails, or cancellation emails sent.
- Leave time zone blank on create only when your LeadCenter app time zone is the correct time zone for the appointment.
- Create or book appointments in LeadCenter when you want them to start appointment automation.
- Start with a simple Zap, such as adding a spreadsheet row for each new appointment, then expand the workflow as needed.

Need more help?
If you can't find the answers you're looking for, our support specialists are available to answer your questions and troubleshoot if necessary.
-
Phone Call (888) 291-7116. Our main hours are Monday to Friday 7 am-5 pm Central Time.
-
Support Send your questions and inquiries via email to support@leadcenter.ai. A support ticket will be created and one of our team members will get back to you as quickly as possible.